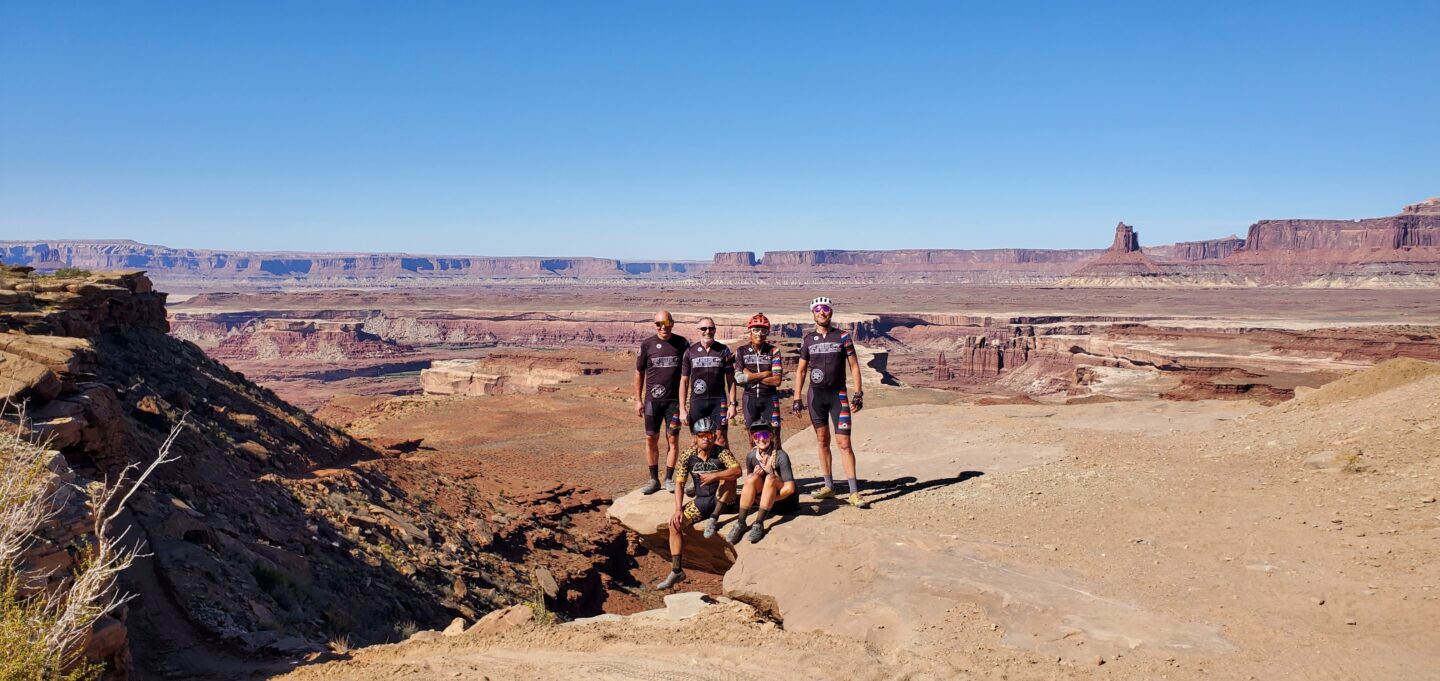
The White Rim Trail continued to elude me up to the morning of our big, one-day jaunt through the Canyonlands National Park. I set my alarm for 4:00 AM the morning of (what we were calling) “Rim Job 2022” and was both nervous and excited for the long day ahead.
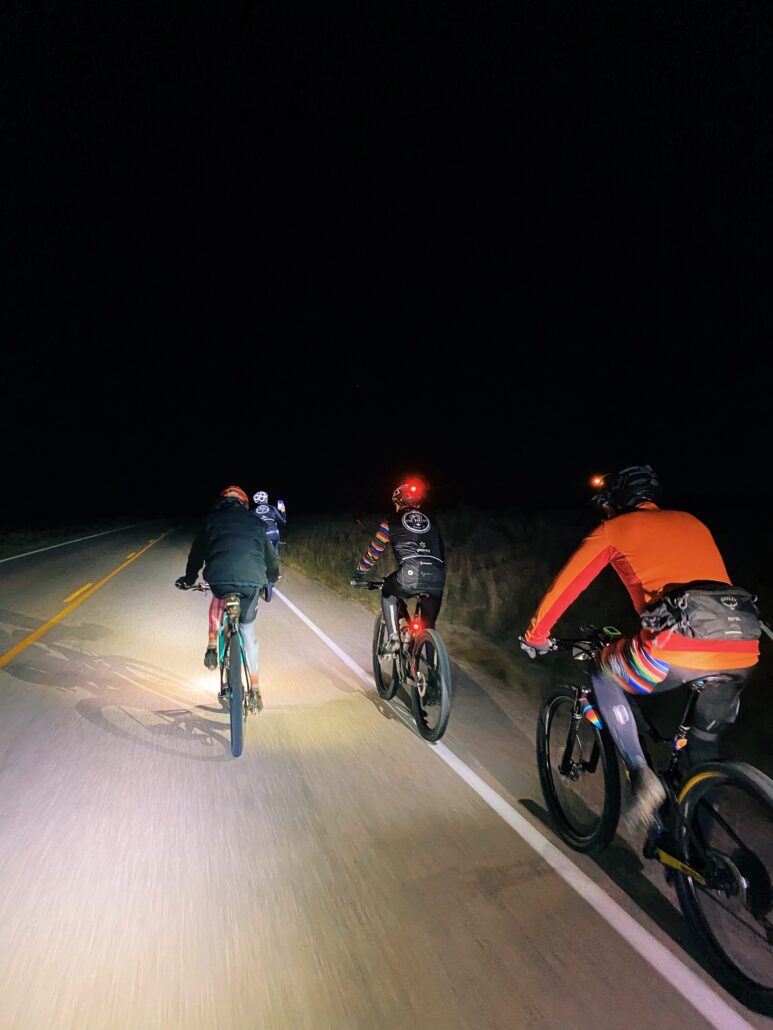
The hundreds of millions of stars and the Milky Way lit up the sky at the Island in the Sky Visitor Center where we all gathered to start this adventure. The weeks and arduous training days all led up to today. As I clipped my helmet straps and slid on my sunglasses, I was worried I wouldn’t be able to hang with the guys, that I’d fall behind and they’d have to wait on me.
Not knowing what to expect, it was easy to doubt myself and my abilities to ride this far (even though I had a handful of road bike centuries under my bibs). As the only woman in our group (and my first invitation to this yearly ride), I felt a certain self-induced pressure to prove I could keep up with the guys for 100 miles. I didn’t want them to regret inviting me to this seemingly holy expedition.
Skip Ahead:
Preparing to mountain bike the White Rim Trail
My favorite moments from the ride
What is the White Rim Trail?
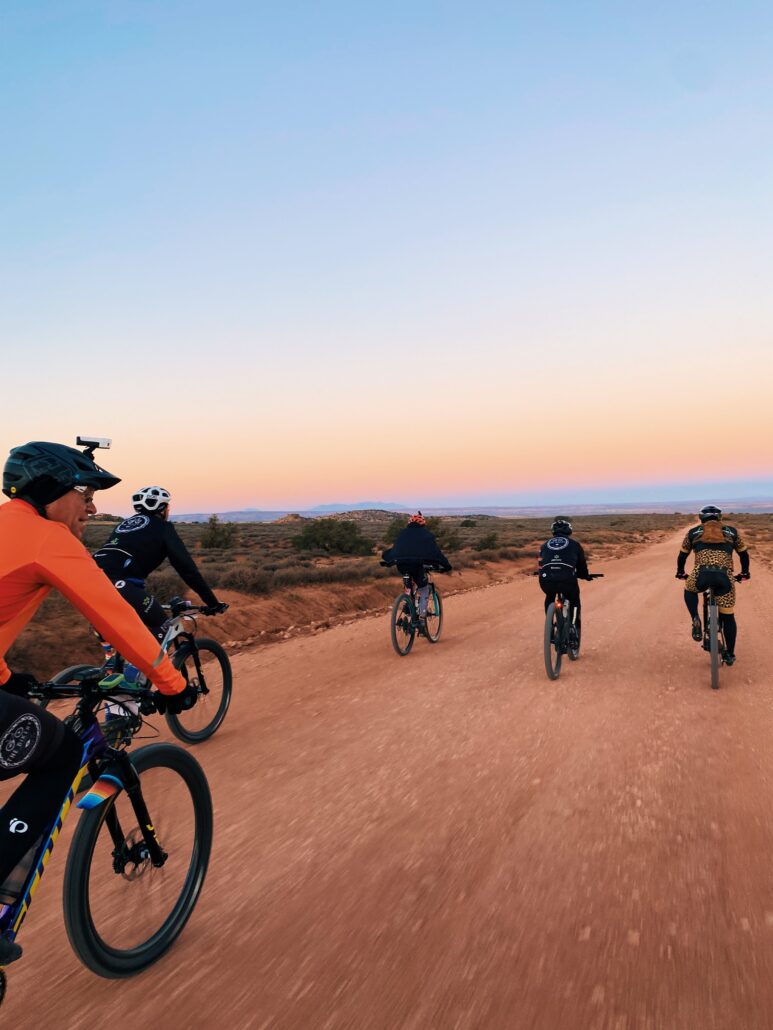
You might be thinking, “White Rim Trail? Never heard of him.” And I hadn’t either until the guys rode it last year and couldn’t stop talking about it. It piqued my curiosity and then I found out it’s a 71.2-mile-long unpaved road that runs along the top of the White Rim Sandstone formation below the Island in the Sky mesa in Canyonlands National Park, Utah.
Not-so-fun fact: Back in the 1950s, The Atomic Energy Commission constructed this trail so companies could mine for uranium deposits to use for nuclear weapons during the Cold War. So, while this trail exists because of war, at least we can enjoy it now without the fighting.
White Rim Trail Fastest Known Time
Come to find out, people compete for Fastest Known Time (FKT) on this trail. Not just the 71.2 miles, but there’s a 102-mile counter-clockwise loop bikers race. As of today (October 17, 2022), the fastest women’s time is by Hannah Wood at 6:51:47. She beat Alexis Skarda by less than one minute. Hannah averaged 14.7 mph.
Not that I was even thinking about going for the FKT (okay, so I thought about it, but wasn’t out to get it), to put her pace in perspective, I averaged 11.1 mph and my moving time was 9:15:47. She was a full 2-something hours faster than me.
To dial it down even more, Hannah’s elapsed time was 6:53:01 and mine was 13:21:57. Sure, we were out for fun and not competing, but she took about a two-minute break during her entire FKT effort. It’s just insane to think about. It’s impressive. So damn impressive.
The men’s FKT? Keegan Swenson did it in 5:28:59. Dig this: his weighted average power was 302 watts. I can hold that for a few minutes before my legs tucker out, let alone holding that for 5.5 hours.
Where does the White Rim Trail start?
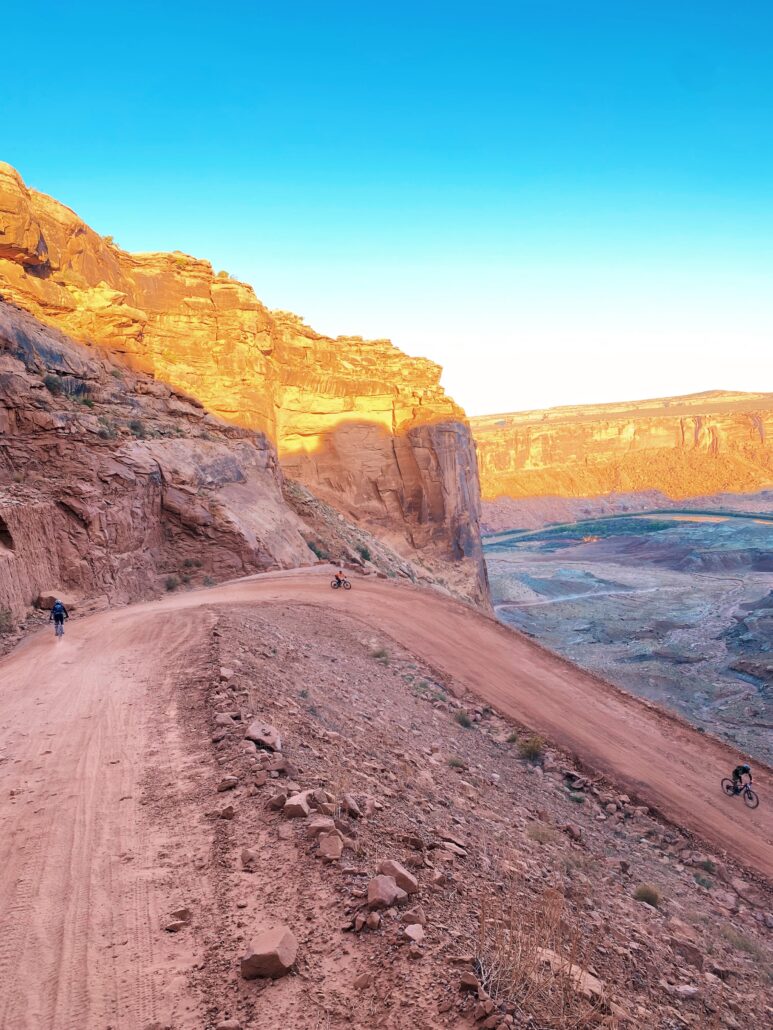
We started at the Island in the Sky Visitor Center and biked north along Grand View Pt. Road to Island in the Sky Road for 9 miles until we took a left on Mineral Bottom Road.
If you want to go for the FKT, then you’ll have to start where the segment starts, which is at the intersection of Mineral Bottom Road and Island in the Sky Road.
If you don’t give a shit, it seems like the “easier” route is to go clockwise: down Shafer Trail first and end at Mineral Bottom. I noticed while we were mountain biking the White Rim Trail, that nearly everyone we saw was going clockwise, opposite us.
How difficult is the White Rim Trail?
That is super subjective. What’s easy and hard for me will be different for someone else, so I can only speak from my training and experience on the White Rim Trail.
Overall, I’d say it’s moderate, especially when you’re going at an endurance pace, which is what we did. If I was racing this, it would have been challenging as fuck.
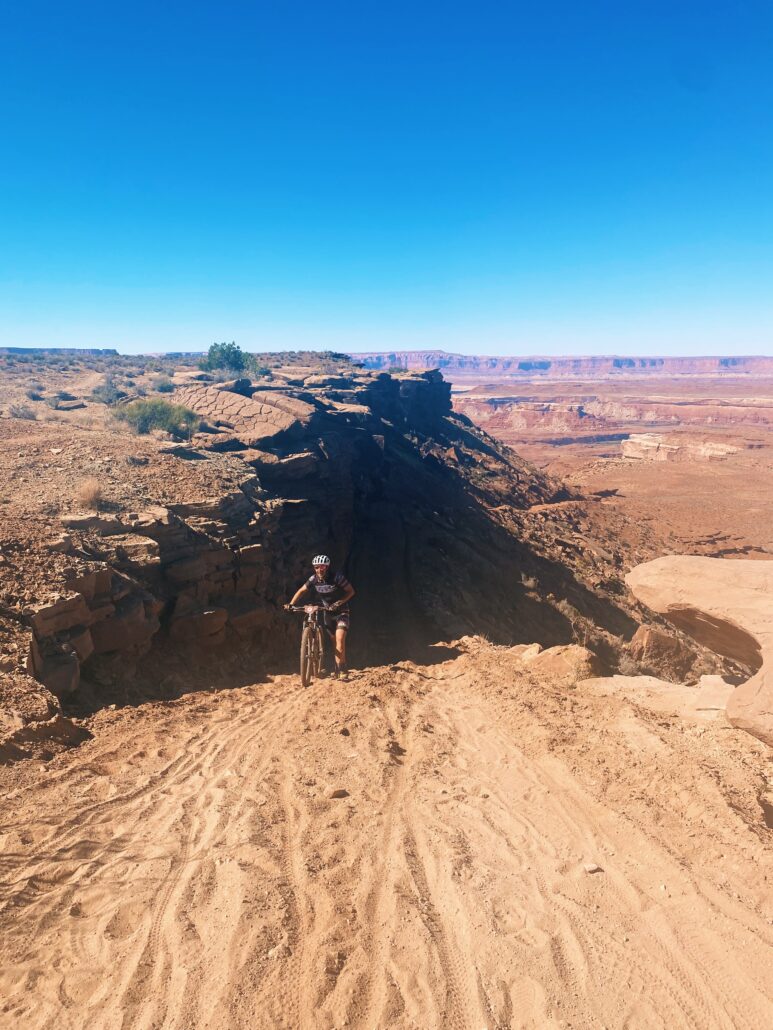
For the first 32 miles, we were mostly descending or riding flatter parts, riding at a fairly leisurely pace. And then we hit our first significant climb that not only was, at times, 18% grade, but had several inches of sand to pedal through. Some of the flats also had ankle-deep sand, which added resistance to pushing the pedals.
In an attempt to boost my own morale, I’d shout, “Cross is coming!” as my front and back tires picked their own lines, which were rarely ever straight.
Around mile 40, it was a gradual ascent until we hit another very challenging climb that maxed out at 14% with again, ankle-deep sand.
There were rolling hills after that and at halfway through, fatigue had definitely set in and if you hadn’t been properly fueling this whole time, you’d feel it ten-fold.
When you’re more than ready to be done, you have to climb Shafer Trail which starts at around 96 miles. When you reach the bottom of this trail, it’s truly intimidating and like you’ve entered a circle of hell you never knew existed. You can see the trail wind up alongside the sheer and jagged rock wall and you realize you’re not going to be done anytime soon.
Shafer Trail is 4.88 miles long and averages 5.1%. Don’t let that fool you because there are sections that are 18% grade too. It took me 54 minutes to climb this segment.
So, how did I prepare for this RKT (Reasonable Known Time) attempt?
Preparing to mountain bike the White Rim Trail
You can’t just physically train to mountain bike the White Rim Trail—you have to mentally prepare yourself for a long day on the saddle. Plus, you need to pack enough water and snacks so you don’t cramp or bonk throughout the ride. There’s also know you need a permit and it’s helpful to have a map.
White Rim Trail Map
I meant to download the White Rim Trail map to my Garmin Edge 1030 prior to starting the ride, but the guys said they knew where they were going and I trusted them. Luckily, there’s only one road you can be on, so it’s unlikely you’d get lost, but to be safe, it’s best to have the map on your bike computer.
If you want to go clockwise, the MTB Project has a downloadable route here. If you want to go counterclockwise like we did (or go for FKT), you can download this route on RideWithGPS.
White Rim Trail Permit
You need a permit to ride the White Rim Trail on your mountain bike and you can only get it the day before your ride starting at 8 AM MT to advance up to 9 AM MT the day of the trip. You can get it on Recreation.gov here. I was nervous about the permits selling out because they limit mountain bike permits to 50 per day (25 available online, 25 available at the park visitor center).
The permits are only $6. Enter your contact information, choose Entry and Exit points, and if you’ll have a car following along, enter its information too. We had to get a separate permit for the car that followed us along the trail.
I didn’t have a printer to print off this permit, so I downloaded the Recreation.gov app and I took a screenshot of the permit so I could show any park ranger who asked (we never saw one, for the record).
Training for the White Rim Trail
My training for the White Rim Trail wasn’t all that structured. Luckily, I had my race fitness going into “training,” so I didn’t have to change much.
The guys didn’t choose a date until mid-September which gave us a month to get ready for this ride. Knowing it was 100 miles with 6,500 feet of elevation gain, and the fact that the guys took 9 hours last time, I wanted to get a ton of time on the saddle.
During the week, I had Zwift races on Tuesday. I also did weights 3 times a week (usually Monday, Wednesday, and Friday). All my cycling sessions outside of Tuesday and a weekend ride were between 1 hour and 2 hours long, usually just endurance pace.
Five Weeks Out
My official “training” started around September 11th. We rode 60 miles, with 3,000 feet of elevation, which took us 4:45. That week of September 5th, I put in 19 hours of training (that’s including weight lifting).
Four Weeks Out
The following week, four weeks out from Moab, we did a 6 hrs. 20 mins. ride that was 64.7 miles with 6,693’ elevation. That entire week totaled 16:22 in training (cycling and strength).
Three Weeks Out
I was visiting Salida this weekend and missed out on the big group ride, but I did get to ride Monarch Pass which was so cool. This ride took 3.5 hours and was 38 miles long. I put in 15 hrs 47 mins total this week for cycling, strength, and yoga.
Two weeks out
I wanted to get in a ride as long as I thought we’d take, but we didn’t hit the time, mostly because of me. The screws on my cleats fell off and it was a helluva time getting everything fixed (I have a different kind of setup that puts the cleat more toward the middle of my foot so I need all these extra doodads to keep it secure and one of those things broke). I ended up having to ride with a normal setup and it started bothering my knees and of course, crotch. Regardless, we rode 5:44 and did 70 miles with 3,724’ of elevation.
That week, I trained 19 hours and 42 minutes with a combo of the same things: cycling, strength, and yoga.
One week out
Our last hurrah until Moab day. I actually cut my training time down drastically and only did 11 hours total. I skipped a strength training session because I didn’t want to be tired for the gnarly route we were doing Saturday. I also had a colonoscopy (…yay…) this week, so I missed two days of training for it.
We rode 40 miles in 4 hrs 17 mins with 4,895’ of climbing. It was a ton of climbing and not just on dirt roads, but some solid mountain biking trails.
The week of
The week of the Moab trip, I sort of tapered for it. I knew we were going to go at a party pace and we’d be taking a lot of breaks, but I still wanted to have my legs ready for it.
Monday: I rode on Zwift for 1.5 hours and skipped strength training.
Tuesday: Raced on Zwift
Wednesday: I rode on Zwift for 1:40
Thursday: I rode an hour on Zwift
Friday: Another hour on Zwift
Saturday: White Rim Trail
I was pretty dizzy for a few days after the Zwift race, which happens every once in a while, and I still don’t know why. I’m assuming it’s because I have Migraine. Instead of risking it outside with my dizziness, I played it safe on Zwift.
White Rim Packing List
Clothing:
- 1 pair of Velocio bibs with Flyfree (it makes it so easy to pull my bibs down from behind to pee really fast without having to also take off my jersey. Game-changer, for sure)
- 1 Cadence Jersey (yes, I know I mixed brands, but fuck it)
- 1 pair of Cadence Socks
- 1 Under Armour Sports Bra
- Workout shorts
- Casual Sweatpants
- 1 shirt
- 2 pairs of underwear
- 1 bra
- 1 pair of socks
- Shoes
- Jacket
- Sweatshirt
Bike Stuff
- Giro SICA VR70 Women’s Cycling Shoes
- My bike
- Garmin Edge 1030 Plus
- All the chargers and wires
- Helmet
- Sunglasses
- Sealant and lube
- Sunscreen
- Chamois Butt’r Ultra Anti-Chafe Balm
- Assos Skin Repair Gel
- Toiletries (skincare, night guard, toothbrush, toothpaste, floss, etc.)
Food/Nutrition
- Microwavable oatmeal
- Nut variety pack
- Chia seed squeeze gel
- Justin’s Chocolate Hazelnut Butter, Peanut Butter, and Almond Butter packs
- Rice Cakes
- Shelf-stable Ripple Milk
- UCAN Edge Energy Gel
- Skratch Labs Energy Chews
- Bobo’s Oat Bars
- Flow Formulas Endurance Mix
- Flow Formulas Electrolytes
- Flow Formulas Recovery Drink Mix

Biking the White Rim Trail
Biking the White Rim Trail comes down to four components: support, nutrition, pacing, and moments that stick out beyond the rest.
Support
We were lucky enough to have Monica, Marc’s wife, follow us around in their Ford Raptor all day long. Having a support car makes all the difference. Sure, we could have brought all of our hydration and nutrition with us, but it was so much more enjoyable to have a car with all of that stowed away instead.
I could stash my entire cycling bag in the back seat that had cleat backups, my inhaler, chamois cream, gloves, and of course, space to store my leggings and arm warmers when it was finally warm enough to take them off.
We had jugs and jugs of water, peanut butter and jelly sandwiches, apples, oranges, bananas, Coke, and whatever else we all individually wanted to bring.
If you’re going to bring your own car, make sure it’s 4-wheel drive with a high enough clearance. While most of the road is pretty okay, I’m sure there are spots where if you don’t have 4WD with clearance, things could get a little murky.
Having a support vehicle can slow you down a little, especially if it’s their first time driving the White Rim Trail, but it ends up being worth it if you don’t want to carry everything with you.
Nutrition
Personally, I probably wouldn’t have stopped as often as we did for snacks and water, but I did take advantage of all the times we took a break. I didn’t want to bonk or cramp, so I either topped off my bottles or had some sort of snack.
Breakfast
I bought microwavable oatmeal packets and 8 oz bottles of Ripple since I had a microwave in my room. I remembered to bring a spoon but totally forgot to bring a bowl with me. The hotel room only had those plastic cups, so I made overnight oats instead.
I used two of those tiny cups to make three servings of oatmeal. I also ate a banana with it in the morning. For being plastic cup overnight oats, they weren’t bad. My focus was more on getting in enough calories to hold me over until later in the day.
I’d been struggling with dizziness the past four days and was a little nervous to have too much caffeine as I’ve learned that makes my dizziness worse. I had two scoops of AminoLean Pre Workout Powder (not that kind of pre-workout) and hoped that’d give me enough energy, but not mess with my vestibular system.
During the Ride
Like I said earlier, I had something at every stop—and we made a ton of stops. Usually, it was either after something pretty gnarly to make sure Monica was okay or when we found a bathroom along the route.
I made sure to top off my bottles at every stop. The bottle I carried on the bike had 3 scoops of Flow Endurance Mix and one scoop of Flow Electrolytes. The bottle on my back was only water.
When I’d get about halfway through the bottle with Flow in it, I’d add another scoop. I probably went through 6 or 7 scoops of Flow Endurance total throughout the day and about 4 scoops of Electrolytes.
Food-wise, I alternated between a gel and real food to make sure my stomach didn’t get too pissy with me.
Another game-changer for me was drinking Coke. I couldn’t tell you the last time I had pop, but the guys continued to rave about how good the Coke tasted. I finally had a small one for myself and wow, nothing tastes better than a Coke 60 miles, 5 hours into a long ride.
Here’s all that I ate and drank throughout the ride:
- Flow endurance (3 scoops x 2.5 – 3-5 bottles)
- Flow electrolytes (1 scoop x 2.5)
- Water (3-5 bottles)
- Skratch chews (x1)
- Bobo’s Bars (x1)
- Justin’s Nut Butter (x2)
- UCAN fuel gels (x2)
- Coke (x2 6 oz)
Calories ingested: 1,996
Calories burned: 4,456
Pacing yourself on the White Rim Trail
Even if you’re going for the FKT, you need to know how to pace yourself. It’s 100 miles of varied terrain spanning from sharp, steep, and sandy hills to deserts of slick rock. Go off too hard too early and you’ll bonk later in the ride. Go too slow and you’ll be out there longer than you want.
At one point during the ride, I had a surge of energy and pushed the pace a little. Unfortunately, that wasn’t sustainable for the whole group, so we slowed down.
As you train for the White Rim Trail, set paces you know you can sustain for at least 7 hours. This would also be known as your Endurance Pace. If you use TrainingPeaks like I do, you can set all your zones by heart rate or power.
If you know your Zone 2, then that’s a great pace for a 100-mile bike ride through canyons and desert. Set your training zones with this article if you need a starting point.

My favorite moments from the ride
It’s hard to pick just a few favorite moments from the ride because A.) there were so many and B.) It all kinds of just blends into one ride.
Seeing the first switchback descent of Mineral Bottom
I had no idea what to expect for my first White Rim Trail mountain bike ride. I never really asked the guys what the scenery was like and I’m okay with that. I loved the surprise of seeing all these different sights.
At our first stop, the parking lot looked over the drop into the canyon. I peered over the ledge and saw switchback after switchback that I was going to ride down (not up). I stopped to take some video of the guys sending it downhill. Of course, the video and pictures don’t do it justice.
And then I got to, and you know, the best part of riding bikes is the downhill. When dust and sand are flying everywhere and you feel like you’re flying down a mountain.
Silence in the middle of nowhere
There were times where we’d all be at different paces, so I found myself riding alone often. I was totally find with it because when I stopped, there was no sound. Seriously. Nothing. No planes, no birds, no people yammering.
It was so quiet, I could hear my ears buzzing. I’d close my eyes and stand still for a minute just to take in the present moment (which I rarely do) and I enjoy the utter silence that I rarely, if ever, experience. Another thing you have to experience yourself. There’s no describing it.
Being able to look in all directions, see absolutely no one, hear nothing except your own breathing and heartbeat and just focus on the now is something people pay big money for. And I was there, covered in sweat and dirt and totally present. It was amazing.
Stopping at the top of the very sandy climb and cheering on Marc and Jackky
We were a little more than halfway through the ride when we reached this gnarly climb. It was steep and covered in ankle-deep sand, and it seemed to never end. Four of us reached the top and hung out. Eventually, we all sat toward the edge and cheered on Jackky and Marc as they made their way through this really shitty section that forced the four of us off our bikes.
There’s power in cheering on people, especially your friends, and especially when you know they’re tired (because so are you). None of us had to sit there and wait for them to keep up over this steep pitch. We certainly didn’t have to use our energy to clap and encourage them up this climb.
But we did because A. We’re not assholes and B. I would have liked a cheering section going up that climb so I’m assuming they appreciated it. I know when I’ve raced in the past that when someone’s screaming for you to “PUSH IT!” and “YOU’VE GOT THIS!” it helps a ton.
You accomplish more with encouragement—whether that’s from yourself or from your four buddies who want to see you succeed.
Having my first Coke
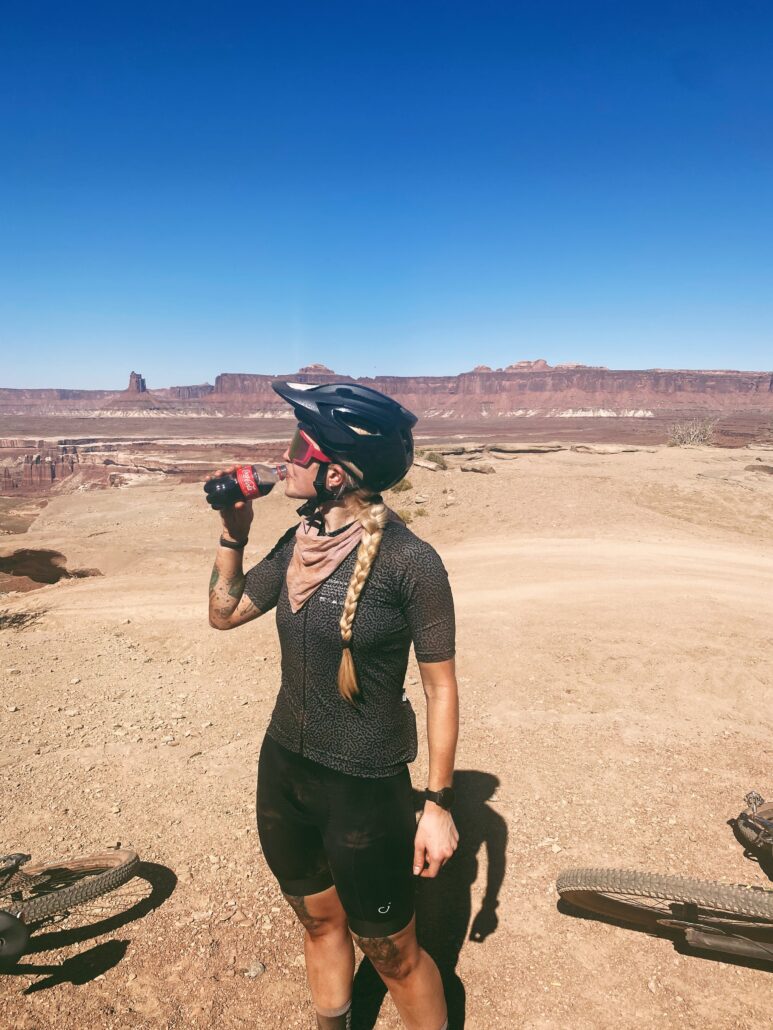
At the top of that steep, sandy hill we decided to make that a pit stop for food and hydration. The guys had been ranting and raving about Coke. I hadn’t had a Coke for, I don’t know, a decade? Maybe longer.
If I’m going to drink pop, it ends up being Zevia drinks or like, ginger beer or rootbeer.
At this point in the ride, I was fatigued and didn’t bring any of my amino acid energy powder, so I was looking for something with a wee bit of caffeine to get me the next 20 miles or so. Marc bought 6 oz bottles of Coke and I finally gave into it.
And let me tell you: A Coke has never tasted as good as this one in the middle of nowhere, mixed with dirt and sweat, in the afternoon. I dare you to find me a better tasting Coke than that one. I couldn’t get over how good that Coke tasted. Being tired, maybe hungry and a little dehydrated will do that to you.
Looking over the edge into the canyon
White Rim Trail is named as such because the road winds around the top of the White Rim Sandstone formation below the Island in the Sky mesa. There was a point in our ride where we stopped at a toilet near the edge of the canyon that overlooked the Green River.
I walked toward the edge, away from the guys, and stood there by myself, just soaking in the quietness again (minus the laughter, chatter, and burps) and looking over the varying terrain that I don’t get to see in my day-to-day life.
I hoped if I stared long enough, it’d imprint itself into my memory and I won’t forget what it looks like. The scale of these canyon walls is just as impressive as looking up to a 14’er. Just how deep they go and the sheer drop of them.
Like, if you fell, you’d fall straight to your death. Yes, that’s something I think about while standing on the edge. There’s nothing gradual about these cliffs and it’s so amazing to see them and realize that they were here millions of years before me and they’ll be here millions of years after me. They will stand the test of time while I will eventually get reabsorbed into the earth.
Climbing up Shafer Trail
This is the one part of the White Rim Trail the guys kept talking (warning us) about. I had no idea what to expect. Everything about this road surprised me so I figured the same would have with Shafer Trail.
I assumed the worst. I figured it’d be straight up for miles and miles and I’d have to eventually walk my bike because it’d be so difficult. At about mile 94, Jackky and I started climbing up a hill. Certainly this was it. The guys were saying it was at the end of the route. I even said to Jackky, “This has got to be it, right?”
We climbed and climbed. I said to Jackky, “This feels like a circle of Hell that was never brought up in Dante’s Inferno.” I mean, honestly, that’s not too bad of a Hell if I get to ride my bike in an astounding part of the world. Sure, I’d have to climb for all of eternity, but from what I’ve read about other circles of Hell, it could be a lot worse.
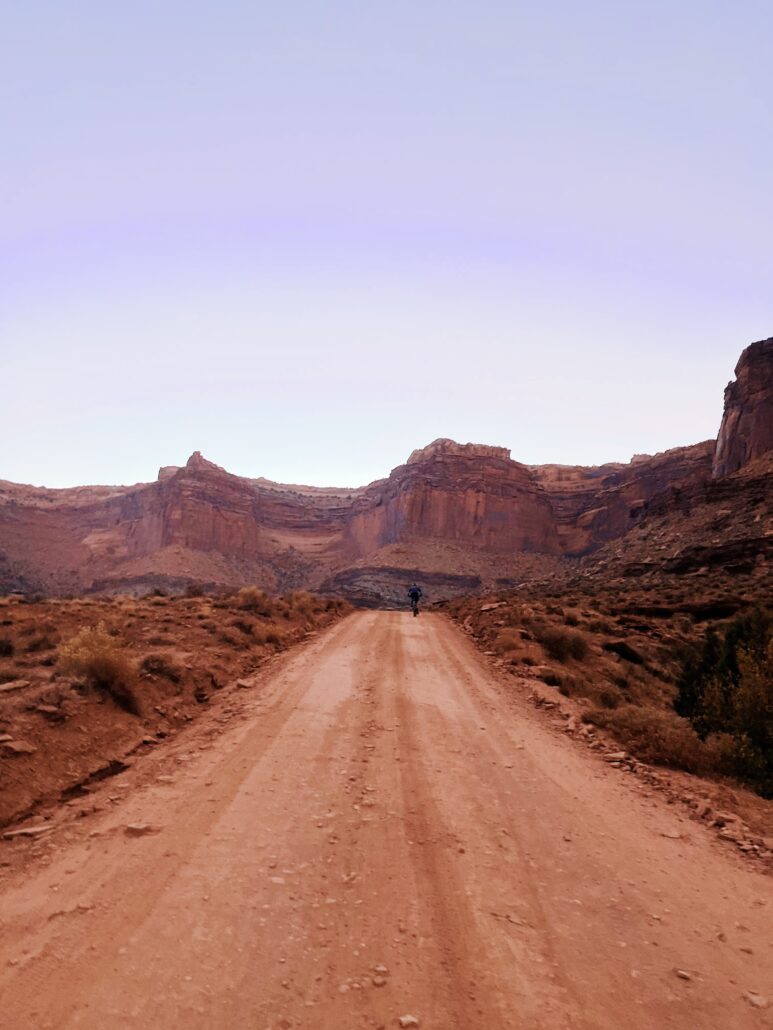
Anyway, we start descending and I’m like, “Nah, this can’t be it. The guys said it’s a climb up to the end.” I looked at my Garmin and we were at mile 97ish when we turned left on to the straightaway for Shafer Trail. I looked up and ahead and I nearly had to stop the bike. Another breathtaking view where I had to also bike up it.
You see, this road we’re on goes straight until it just go up. And up. And up. Zig-zagging until you can no longer see the road, but you know it’s there, somewhere, hiding behind the steepness of the cliff.
It wasn’t as bad as I imagined, but it certainly lived up to the stories the guys told us. It was 4.88 miles with an average grade of 5.1% (topping out at 21%) gaining 1,319 feet. At the end of 96 miles, this short climb felt monumental.
The two MIkes were ahead of Jackky and I and I assumed we wouldn’t see them until we were back at the Visitor Center. As the road tilted, Jackky said to me, “I’ll see you at the top.” Not knowing how bad this climb was going to be, I held back, but eventually dropped Jackky. As the competitive asshole that I am, I thought, “Sweet, I’ll be third to the finish line.”
I kept looking ahead and pedaled at a smooth 70 rpm. Then I saw someone walking their bike up ahead. It was either one of the Mikes or some stranger. By this point, I had to turn on my light because it was getting too dark to see the road and especially the cliffs.
It was Mike J walking his bike. I found out he cramped up and he was going faster walking his bike. I could have been a jerk and kept riding, but I didn’t want to see him walking his bike when we were this close so I offered my last gel and water. He took both, thankfully.
We rode the rest of the way together, wondering when we’d finally reach the road to get back to the Visitor Center. And then we did. Mike M. was there, and then we started recounting the last 25 miles of the route.
White Rim Trail Aftercare
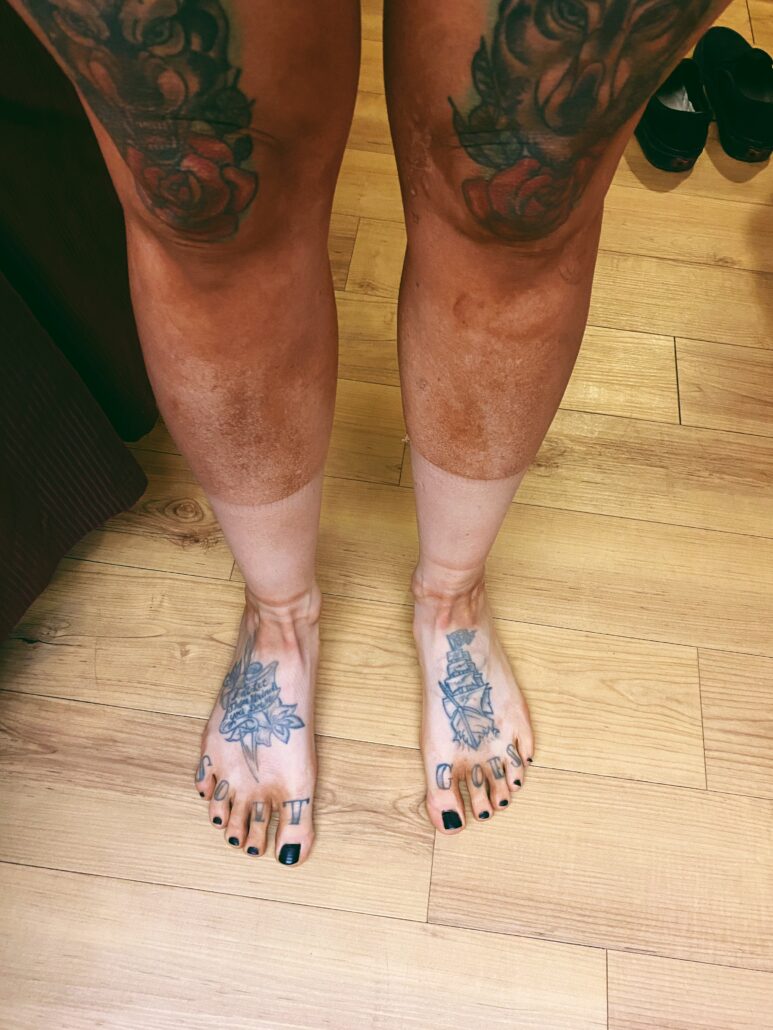
Being in your bibs for 14 hours is really fucking gross. I don’t care who you are.
I was worried about getting one or more saddle sores. I used Chamois Butt’r Ultra Anti-Chafe Balm which did okay. At the beginning of our ride I slathered it on, and then reapplied halfway through. It’s supposed to be for endurance riding and I’m on the fence if I agree. And I put on a hefty amount. Like, there’s no part of my skin that’s left untouched where it should go.
After the ride, my crotch was rubbed raw. Plenty of chafing happened. My vagina was also very unhappy with the mix of chamois cream, sweat, heat, and dirt that she had to endure for 14 hours. I’ve apologized several times since the ride. This is what I did to try to help everything recover and what I wish I would have done (P.S.- I’ve written about how to help prevent saddle sores before on my blog, give it a read if you want a deep dive into saddle sore care.)
Post workout drink and water
You want to replenish your glycogen storage and help your body recover. And by having a recovery drink with carbs and protein, you refuel your muscle and liver glycogen. Then you can get back on your bike sooner.
I brought Flow Formula’s Recovery Drink Mix in a shaker bottle and left it in Monica’s car to drink after the ride. I drank it as soon as she pulled up. Normally, I’d drink it as soon as I finished riding my bike, but she was busy trying to drive over sketchy things, so I waited until they got to the Visitor’s Center.
I also left my Hydro Flask water bottle in Monica’s car so I can drink more water. I’m sure I was a bit dehydrated, even though I stayed on top of my fluids. Well, until the last climb up Shafer Trail. And then, it was mostly about getting done as quickly as possible because I was over being on the bike by then.
Shower, Shower, Shower
I couldn’t wait to get back to the hotel to shower. It felt like the chamois cream and sweat and all of that had burrowed into my skin. I was honestly super grossed out with the state of my body. It was covered in a solid layer of dirt and dust.
My skin broke out all over and I stood underneath the showerhead long enough to make the environmentalist in me feel ashamed.
I wish I would have brought some Epsom Salt to soak in the bathtub, which is what I normally do after long rides at home. It helps your legs recover a lot better too. My crotch would have appreciated something like that—to maybe kill off the bacteria. Alas, I didn’t bring any with me and I regret it.
I also wish I would have brought my typical aftercare lotions and gels and soaps—like Benzoyl Peroxide and Hibiclens Antiseptic Antimicrobial Skin Cleanser—to help my crotch and ass recover.
Skincare
Recently, I ran out of the Doc’s Saddle Ointment and they seem to be out of business or something, so I looked for something else that’d replace it.
I found Assos Skin Repair Gel and saw it was $25 for 3.21 ounces. I didn’t want to spend the money because that’s expensive. But I bought it in hopes it’d help my skin recover and prevent saddle sores.
And wouldn’t you know: it worked, which is very rare for me. I applied it after my shower and again in the morning the following day. Sunday night, I applied it again, and then Monday morning. By Tuesday, all the bumps and chafing were pretty much healed. I highly recommend investing in this gel if you’re prone to saddle sores, bumps, redness, and any sort of chafe.
Thanks to my patrons who make my writing possible. You can become part of our club here:
Become a Patron!Disclosure: I’m a participant in the Amazon Services LLC Associates Program. When I link to products and services, those links may be affiliate links. If you click on any of those affiliate links and make a purchase within a certain time frame, I’ll earn a small commission, at no cost to you. I only link to products and retailers that I use myself and would recommend to a friend. Money earned keeps my website running and allows me to do what I love—which is writing. Thanks for your support.
Waiting patiently for you to come home and fuck me! https://is.gd/dBsd60
Interesting read! Seeing more platforms like ph889 login login prioritize responsible gaming & mental wellbeing is a huge step forward. It’s not just about the wins, right? Good analysis!
S66plus… I’m always searching for new platforms to play at. The interface seems friendly to use. Is it worth it? Have a look: s66plus!
Interesting analysis! Strategic account creation is key, as with any platform. Thinking about optimized user interfaces, have you explored phplaysuperace download apk? Seems like they’re focusing on that in the Philippine market-good stuff!